🗂️ Anki Guide #3: Cloze deletions
Table of Contents
Intro
Time for something a little more advanced! If you already cleared Parts 1 and 2 of the Learning Japanese with Anki series, then it’s time to move on to cloze deletions!
What are cloze deletions?
Up until now, we’ve created Recognition and Recall cards that are essentially flashcards: write ABC on one side, XYZ on the other. This is fine for vocabulary words and set phrases. But after a certain point, you may start wanting to use more elaborate sentences. You don’t necessarily want to memorize those sentences, but you still want to review them and quiz yourself on things like particles, or choosing which is the most appropriate word to fill in the blank, that kind of thing. And that’s where cloze deletions come in. Cloze deletions, in essence, create fill-in-the-blank cards from your notes.
Let’s say, for example, that you are trying to remember both the formal 硬い and informal 日常会話 way of saying, “like this.” You could make three separate notes: one for このような, one for こうした, and one for こんな. But that’s not very practical, since you want to study all three together as a group: quizzing yourself that このような means “like this” doesn’t really stick. So instead, you could use cloze deletions to make one note that looks like this:
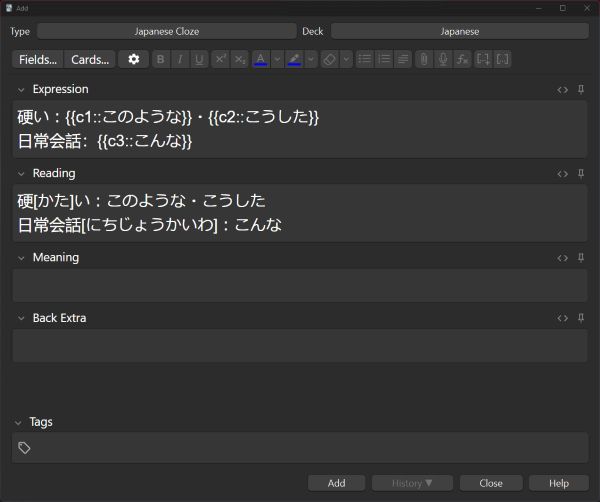
Which will generate three cards, the first looking like this:
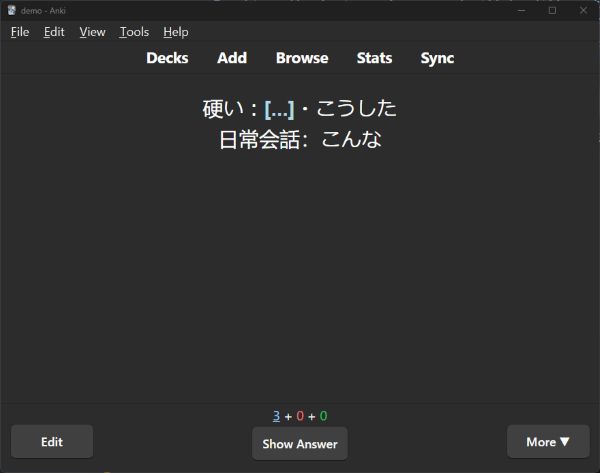
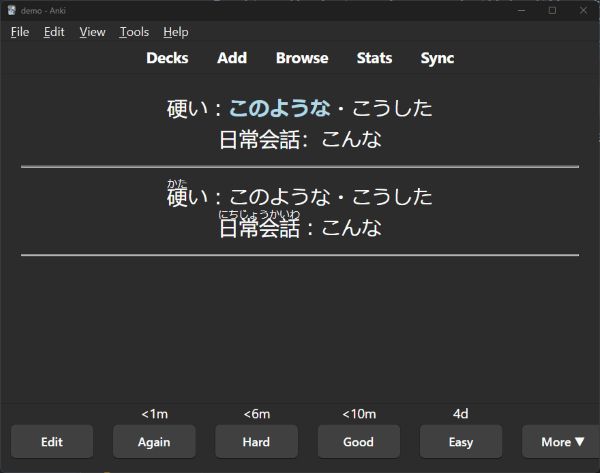
And the second like this:
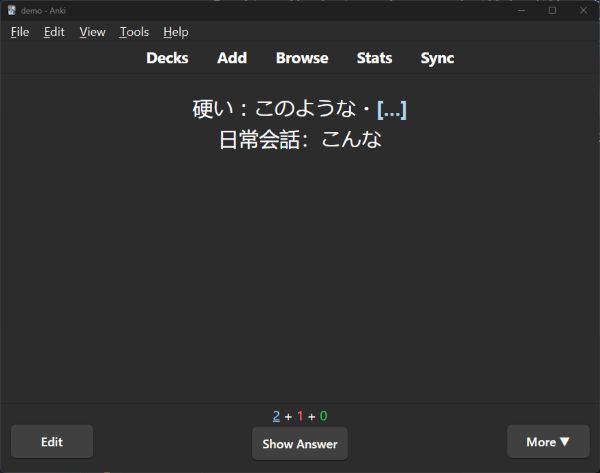
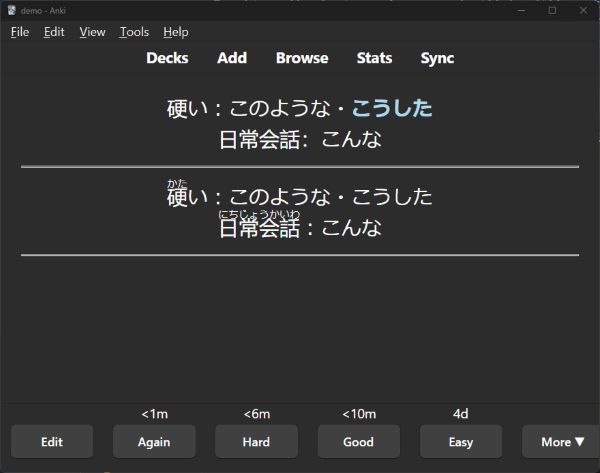
And the third like this:
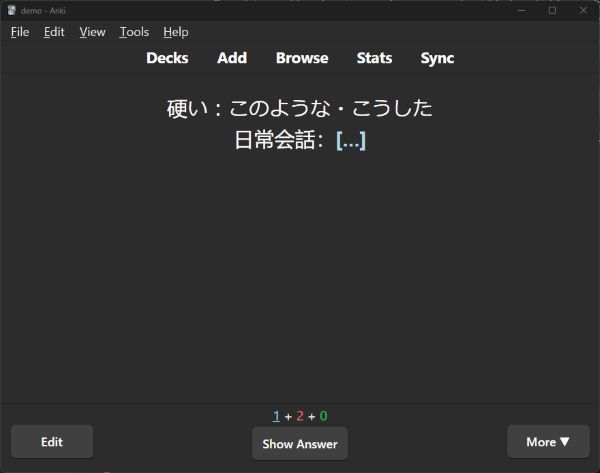
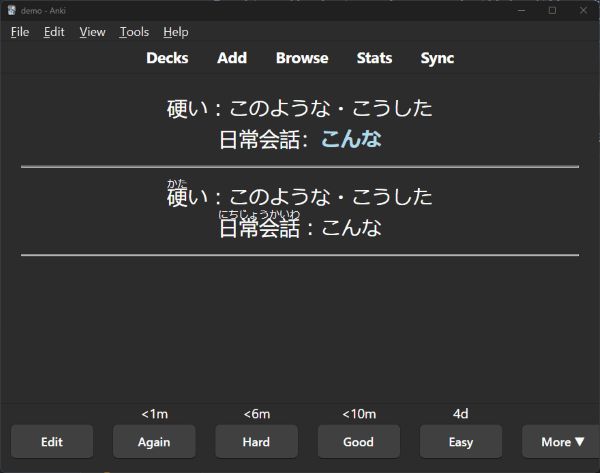
But before we can start making Japanese cloze cards like this, first we need to do kind of a lot of setup. I know! It sucks! But bear with me, because cloze deletions are very cool!!
Making the Japanese Cloze note type
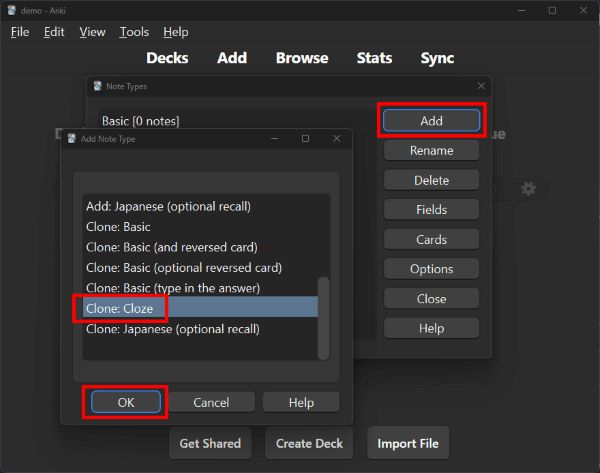
It’s time to once more go to Tools > Manage Note Types. Click the Add button, highlight Clone: Cloze, and then click OK. Rename your new note type to Japanese Cloze. (Note that you need “Japanese” somewhere in your note type for the furigana plugin to work.)
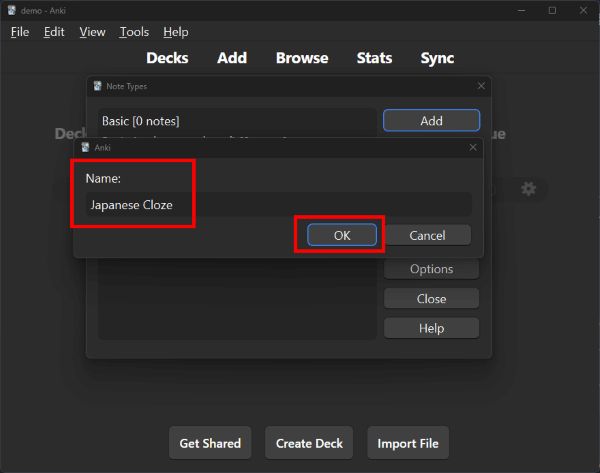
Editing the Japanese Cloze fields
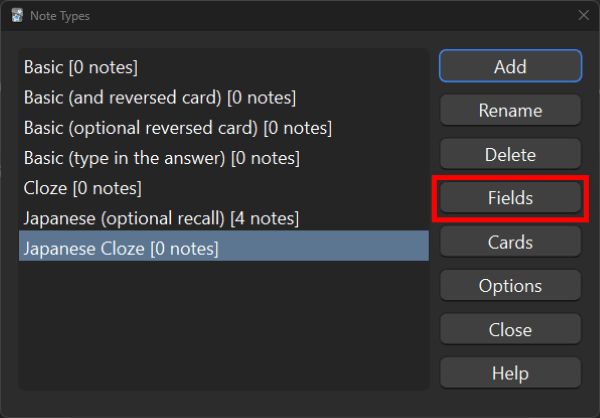
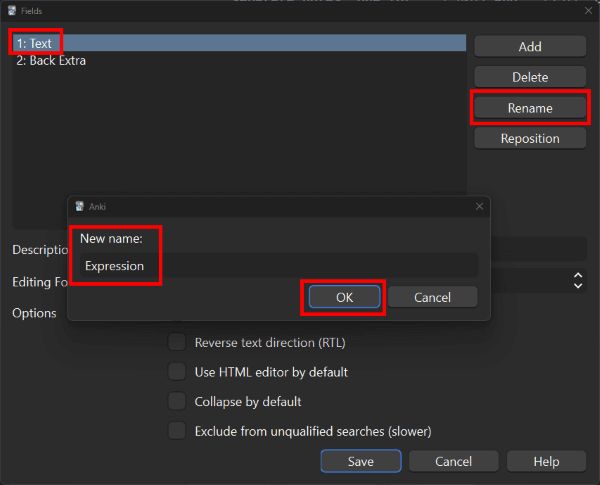
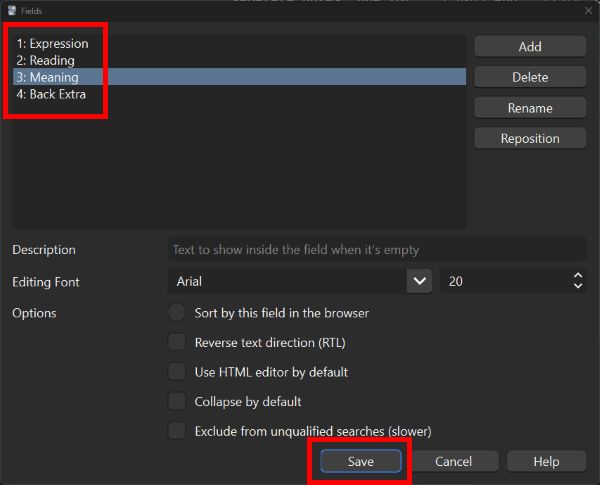
Next, highlight your new Japanese Cloze note type, then click Fields. Rename the Text field to Expression, then Add a new field named Reading. Remember, you need these two fields to generate furigana readings.
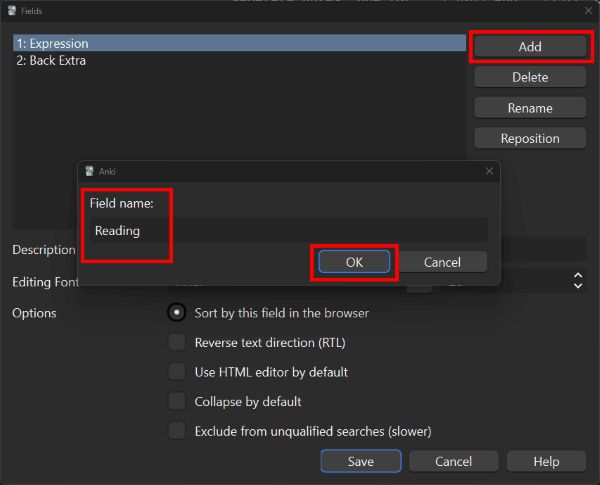
You can finish editing your note type here. But I also want to add fields for Meaning, and rearrange things so that I can add new notes more quickly. Once you’ve got things the way you want, hit Save.
Editing the Japanese Cloze card templates
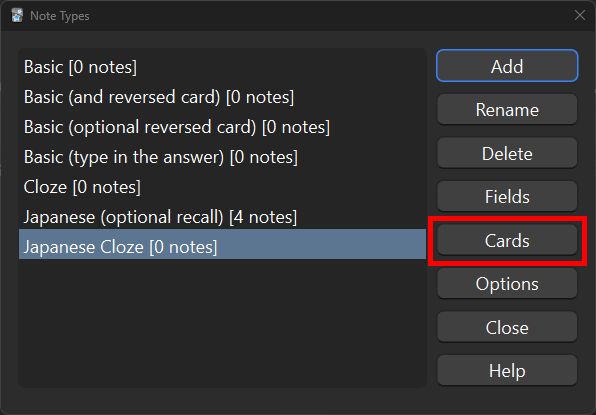
Back on the Note Types window, highlight Japanese Cloze and then click the Cards button.
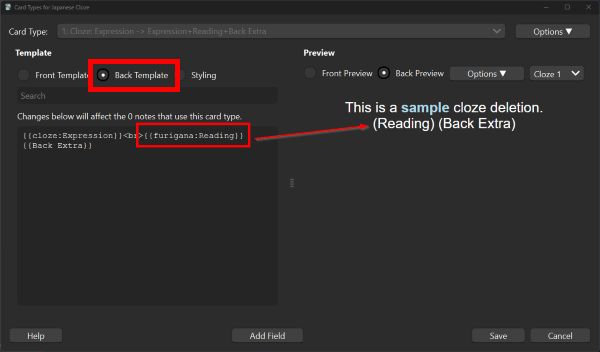
Click the Back Template. This is where you need to get a little fancy. Manually type in {{furigana:Reading}}. Note that using the Add Field button will not add the furigana, you need to type it in.
Now to add in your {{Meaning}} field. I also personally like to add some <hr> lines and <br> spaces to make the back of the card a little easier to read:
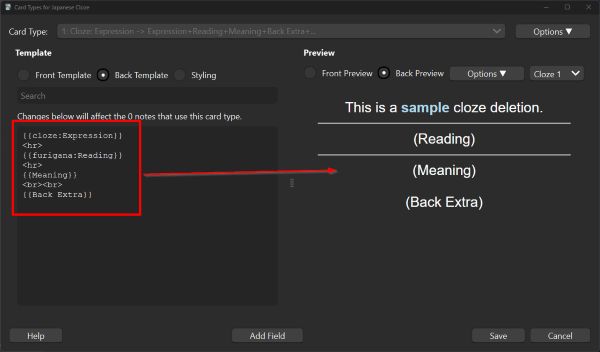
Save your card type, Close the Note Types window, and let’s start adding cloze deletion notes!
Adding Japanese Cloze notes
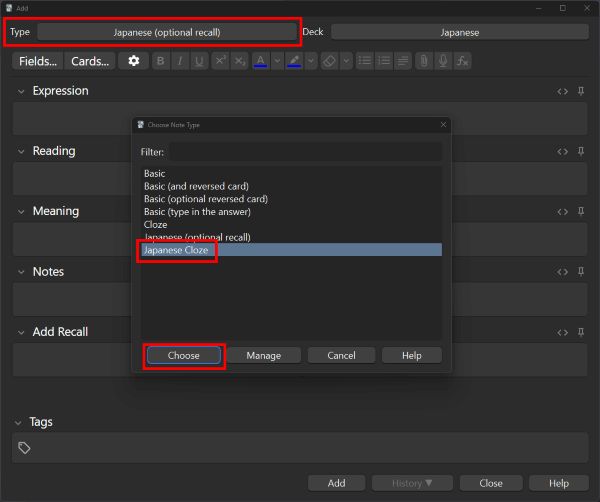
Click the Add button, then click Type in the upper left corner, highlight Japanese Cloze, and then click Choose.
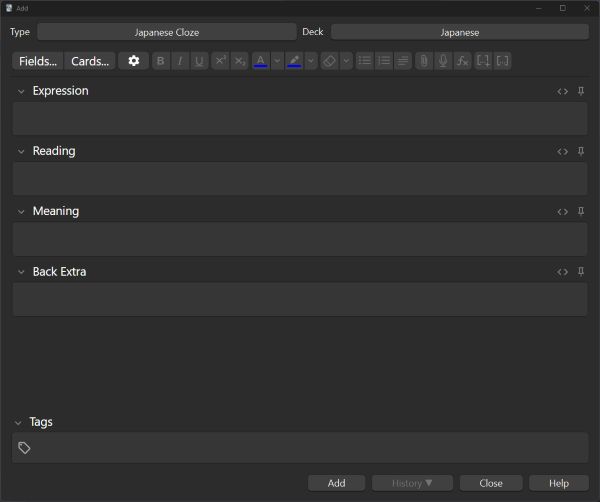
From there, enter your text into the Expression field, and let the Reading field populate.
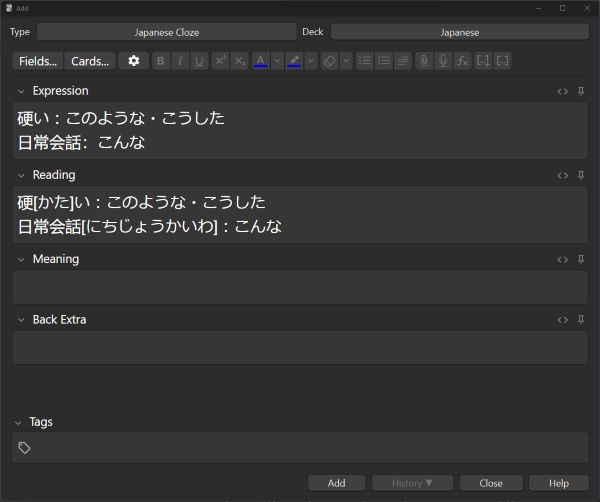
AFTER you have let the Reading field populate, move on to the next step. I cannot stress enough that you do not want to move on before letting the Reading field populate. (It’s not the end of the world, but it is a PITA having to delete the {{c1::}} stuff out of the Reading field.)
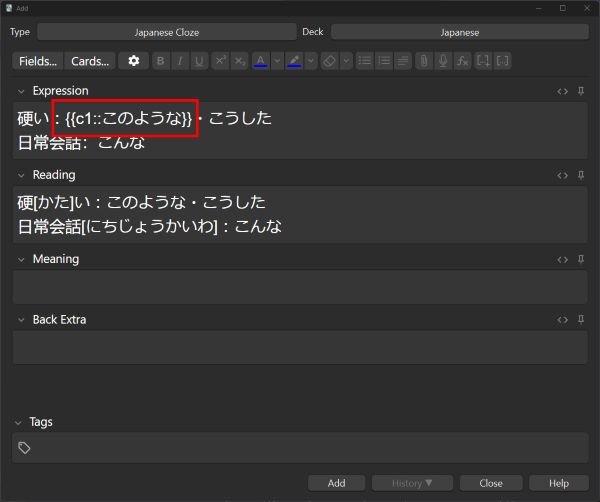
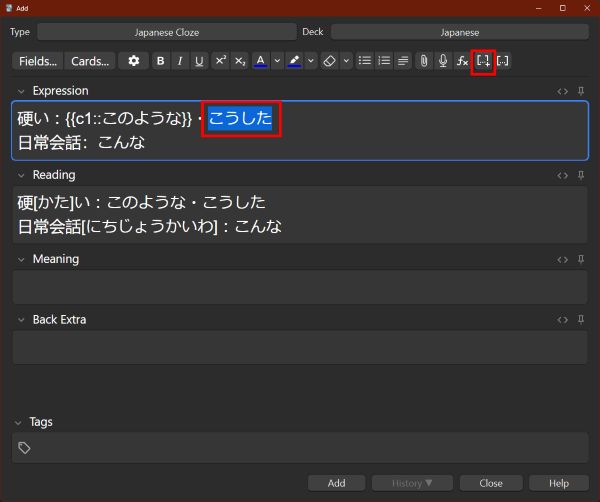
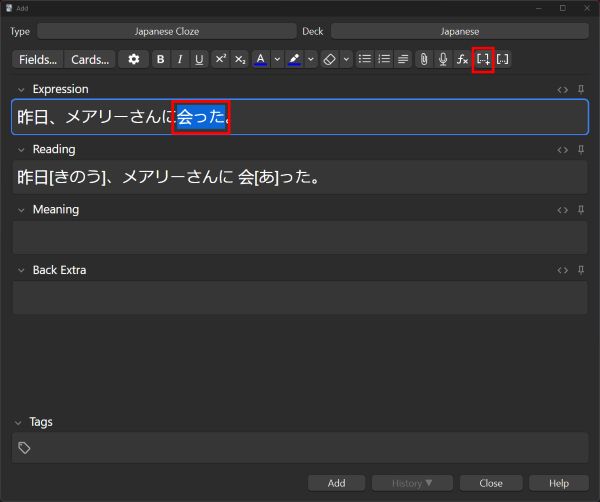
Next, highlight the part that you want to snip, then click the […+] button:
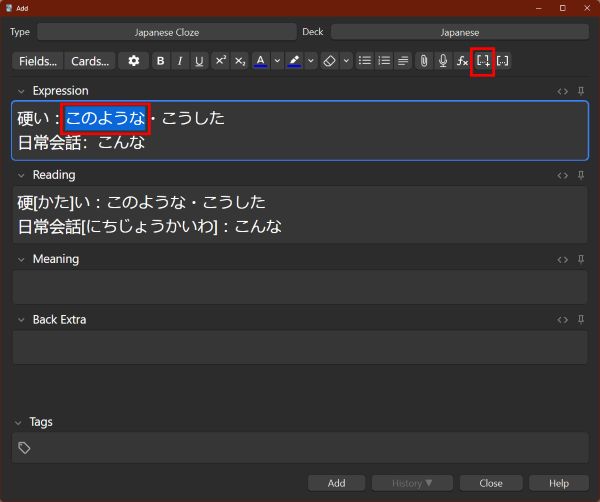
Your editor should now look like this:
Do the same for anything else you want to cloze:
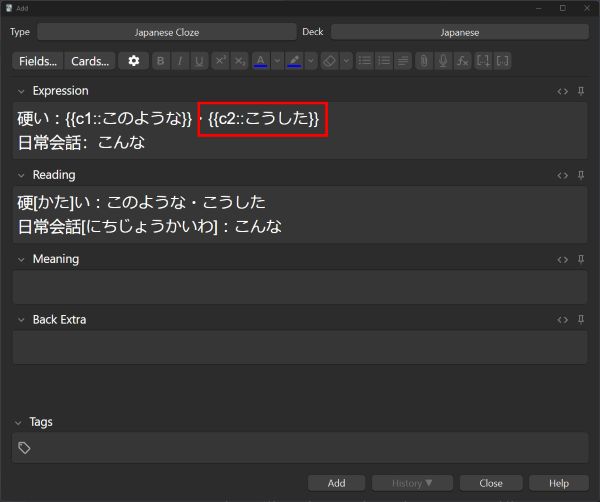
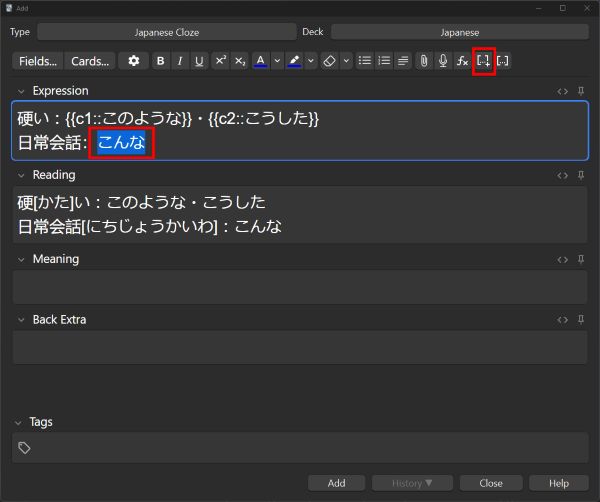
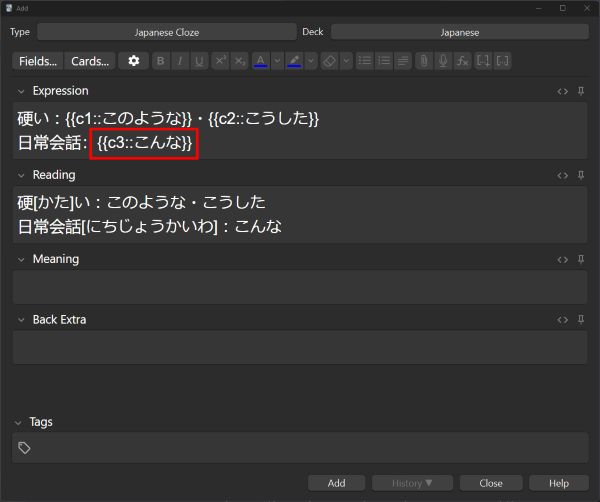
When you’re finished, click Add. And voila! You have created a cloze deletion note which will generate the three fill-in-the-blank cards at the top of this section!
Other ways of using cloze deletions
Transforming words
Let’s say you are studying how to conjugate verbs into their casual past tense forms, and want to quiz yourself by looking at the dictionary form. You could make a cloze note that looks like:
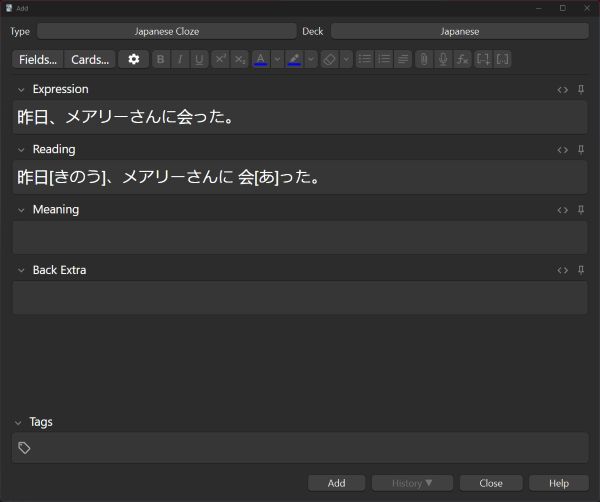
From there, highlight 会った and cloze it off:
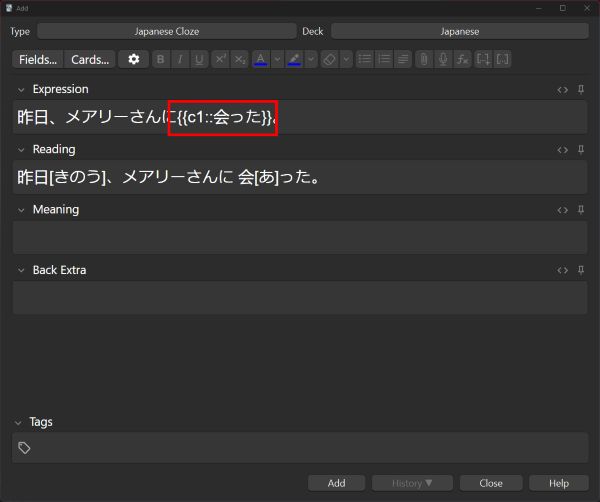
Then, edit the cloze so it reads {{c1::会った::会う}}:
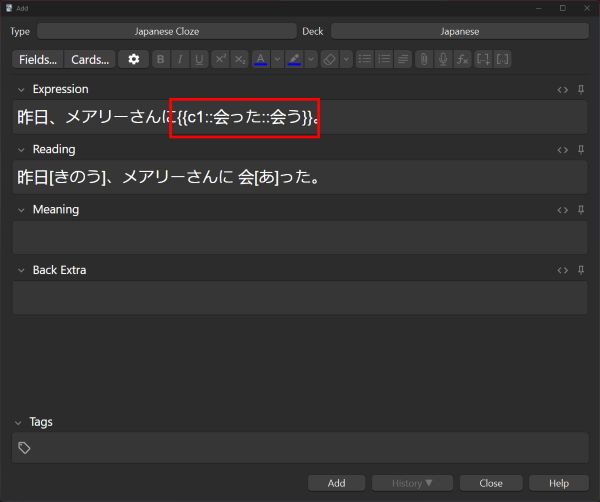
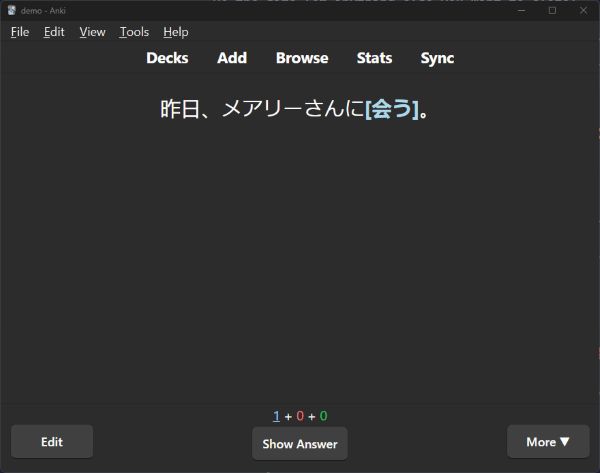
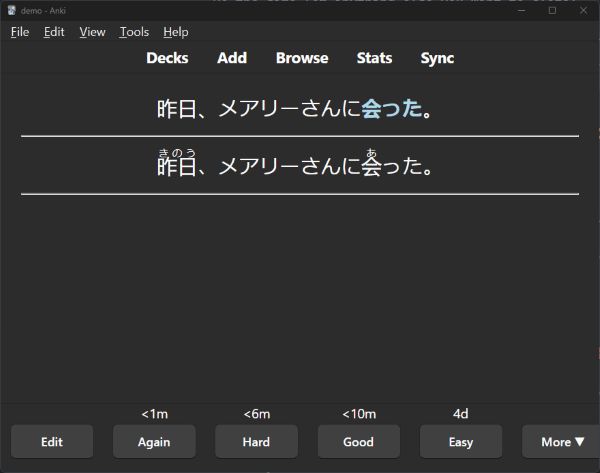
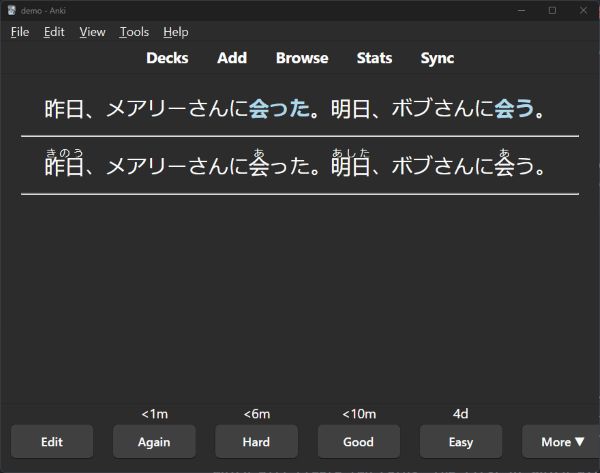
Add this note, and when you go to review it, it should look like this:
Multiple choice
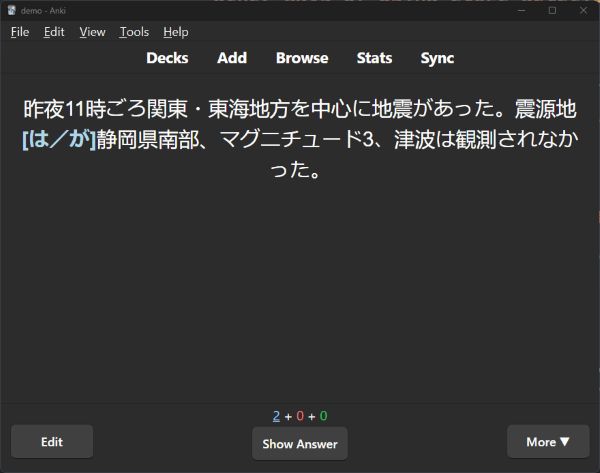
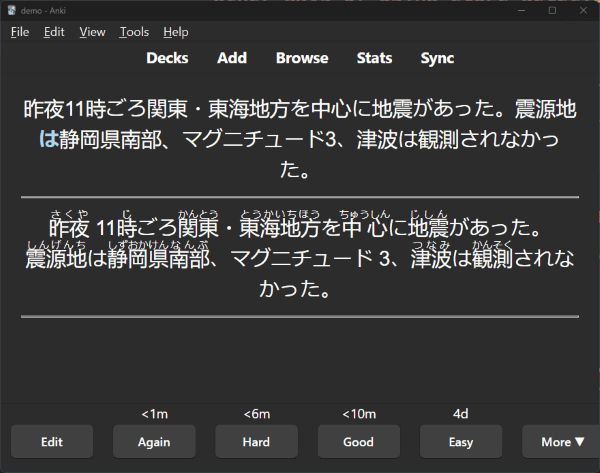
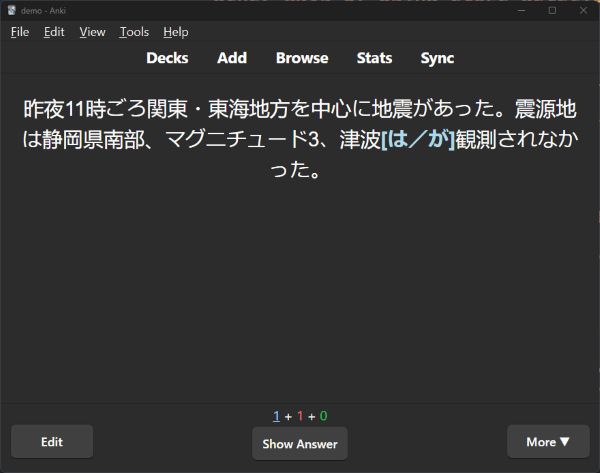
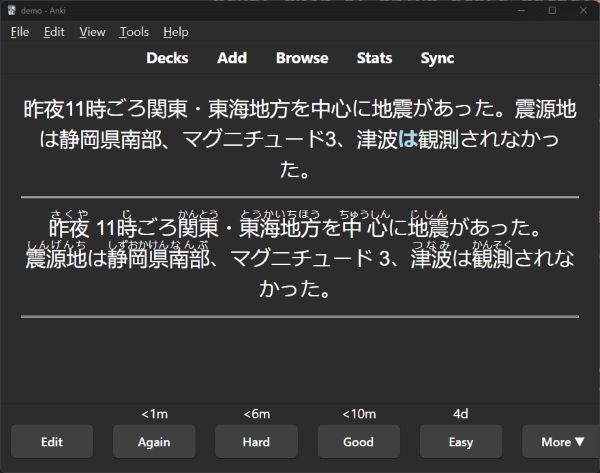
Using the same idea as above, you can even add simple multiple choice questions. Try not to go too overboard since having too much info on the front of a card can be overwhelming. So something like this can be useful to quiz は vs が usage:
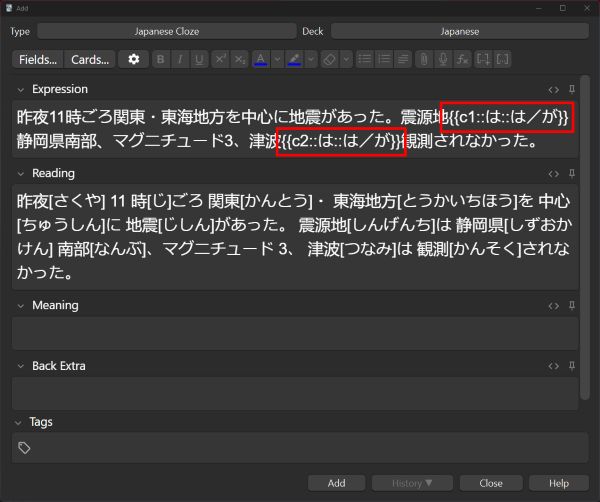
Which will create two cards that look like:
Fill in multiple blanks for one card
You can also use the […] button without the + to create multiple cloze deletions for the same card. (You can also just check to make sure your c1, c2, etc are matching.) So for example, if you make a note that looks like this:
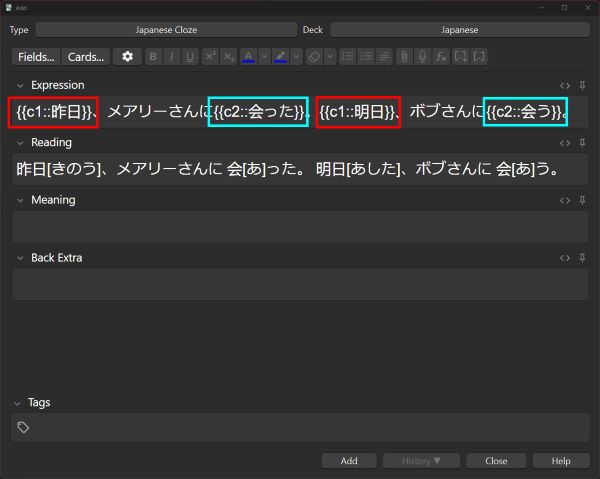
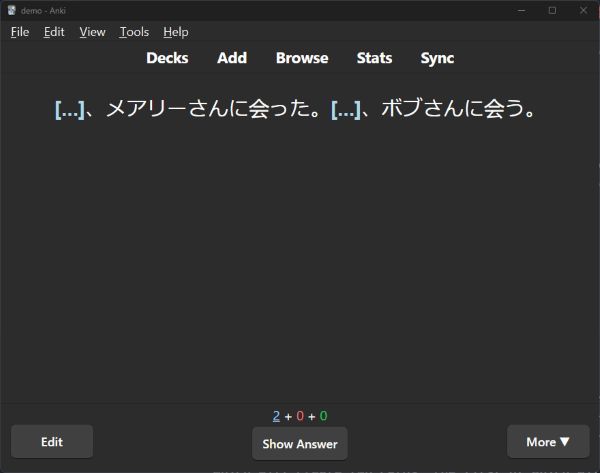
…Anki will create two cards, the first of which will look like this:
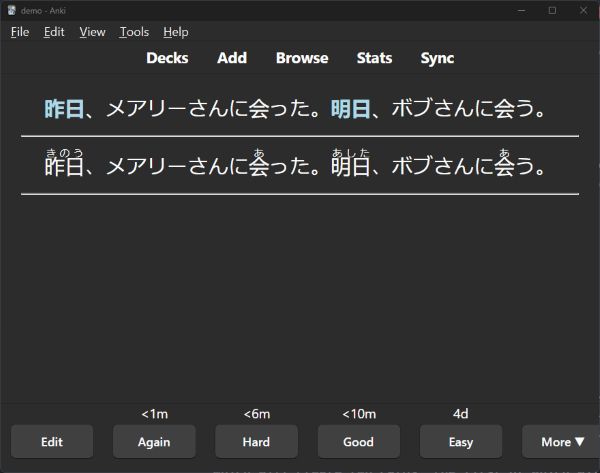
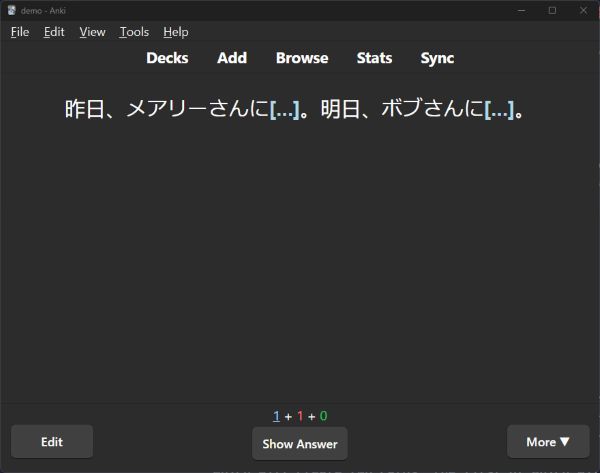
And the second like this:
There’s lots of simple ways to quickly turn your notes into cards using cloze deletions!
The Golden Rules of Anki
DO NOT overload your notes with too much stuff. It is tempting to dump an entire news article into a note and start clozing stuff off, but DO NOT DO THIS. I am telling you as someone who has suffered so much Anki regret. PLEASE LEARN FROM MY MISTAKES!
Try to limit the front of your cards to one, two sentences max. You should not take more than a few seconds to read whatever is on the front. If you bring up a card and it is just a big block of text that makes you want to give up studying, THAT IS TOO MUCH AND YOU NEED TO BREAK UP THE NOTE INTO SMALLER CHUNKS, or rethink which part you actually want to retain and study. LESS IS MORE.
Likewise, DO NOT SPEND A LOT OF TIME MAKING A SINGLE NOTE. The idea is to crank out notes quickly and painlessly. Do not spend a lot of time formatting your cards’ stylesheets to perfection. Do not add tons of fields to your note types that you need to fill out each time. You should be banging out notes quickly and in seconds, and spending the vast, vast, VAST majority of your time actually reviewing your cards. Your goal is not to have a perfect sparkling Anki deck, your goal is to LEARN JAPANESE. So get going!!